Nothing Performs Like Chemtronics

CircuitWorks Flux Remover Pens

CircuitWorks® Flux Remover Pens are designed specifically to remove each type of flux:

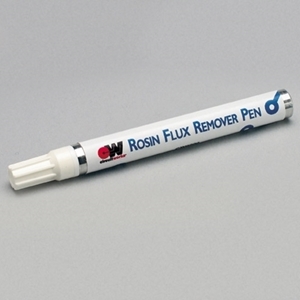
  • Rosin Flux Remover Pen quickly cleans type R, RMA, and RA flux residues.
  • No Clean Flux Remover Pen precisely removes both organic and synthetic low solid no clean fluxes.
  • Lead-Free Flux Remover Pen quickly cleans type R, RMA, and RA rosin flux residues as well as organic and synthetic no clean fluxes used in higher heat lead-free applications.

Features & Benefits

  • Completely removes flux in seconds
  • Spot cleans tight tolerance areas on circuit boards
  • Marker dispenser provides controlled spot cleaning
  • Dries fast

TYPICAL APPLICATIONS

CircuitWorks Flux Remover pens remove flux residues and clean precise areas on: 

  • Printed Circuit Boards 
  • Chip Carriers 
  • Heat Sinks 
  • Surface Mount Device Pads 
  • Switches 
  • Sockets

Swipe to View Add to Cart Button 

Part # Size
CW9200

Rosin Flux Remover Pen - 8 g (0.28 oz.) pen

CW9100

No Clean Flux Remover Pen - 9 g (0.32 oz.) pen

CW9400

Lead-Free Flux Remover Pen - 9 g (0.32 oz.) pen

Contact Us for Pricing

FAQ's

How do I use a conductive pen?

Here's a step-by-step guide on how to use a conductive pen: Step-by-step process:Expose conductive surface of repair area: When repairing a trace, conductive ink needs to have good contact with the beginning and end of the gap. This often involves scraping way resist to expose the conductive surface. Prepare the surface: Clean and free from any debris, dust, or old solder. You can use isopropyl alcohol and cotton swabs to clean the area properly. Shake the pen: Before using the conductive pen, shake it vigorously until you hear the click of the internal bearing, which provides agitation within the pen. If the ink is dark and not a silver color, continue to shake the pen to fully mix the ink. Prime the pen: When using the conductive pen for the first time or after a long period of non-use, you may need to prime the pen to get the ink flowing smoothly. Press the tip of the pen against a scrap surface (e.g., paper or a non-conductive material) until the ink starts flowing. You may need to clear the tip of dried ink with a wipe saturated with solvent like isopropyl alcohol (IPA). Draw the conductive trace: Hold the conductive pen like a regular pen or marker, and apply gentle pressure to the surface while squeezing the barrel. Be precise and steady in your movements to get a clean line. You can draw lines, bridges, or connect components, just like you would with a pen or a pencil. Cure the ink: Let the ink air dry for at least 1 hour. Test the conductivity: Once the ink is cured, use a multimeter or continuity tester to test for continuity between the endpoints of the trace to ensure the connection is complete. Clean the pen tip: After use, make sure to wipe the tip of the pen clean with a wipe. This prevents the tip from getting clogged and ensures better performance in the future. CircuitWorks Repair/ Cleaning Products Learn more in our Blog Follow our Linkedin

How do I use no-clean, rosin, or aqueous flux dispensing pen?

Using a flux dispensing pen, whether it's a no-clean, rosin, or aqueous flux, is a straightforward process. Flux is used in soldering to remove oxidation and improve the wetting of solder, ensuring better solder joints. Here's a step-by-step guide on how to use a flux dispensing pen: Preparation:Ensure you have the appropriate flux pen for your application (no-clean, rosin, or aqueous flux). The specific type of flux depends on your soldering needs and the type of components you are working with. Clean the Surface:Before applying flux, make sure the surface you are about to solder is clean and free from any debris, dust, or oxidation. Clean it with a lint-free cloth if necessary. Prepare the Flux Pen:Remove the cap of the flux pen.Tap the tip on a flat surface to saturate the tip.If there is dried flux or other residue on the tip, rub it off on a wipe. Apply Flux:Hold the flux pen like you would hold a regular pen or marker, with the tip facing downwards.Gently press the tip against the surface where you want to apply the flux. Be careful not to apply too much pressure as it may lead to excessive flux application.Move the pen across the area where you want to apply flux. The flux will flow out through the tip as you move it. Soldering:Once you have applied the flux, proceed with the soldering process immediately. Clean Residue (if applicable):If you are using a no-clean flux, it is designed to be left on the board without cleaning, depending on the requirements the electronics. If you used a rosin or aqueous flux, you should clean the board after soldering to remove any residue. Use a cleaning solution that is compatible with the type of flux you used. Recap the Flux Pen:After use, make sure to recap the flux pen tightly to prevent the flux from drying out or leaking. CircuitWorks Repair/ Cleaning Products Learn more in our Blog Follow our Linkedin

What does conductive pen do?

Conductive ink pens are specialized writing tools designed to draw circuits and create electrical connections on various surfaces. The ink used in these pens contains conductive materials (e.g. silver), which allow it to conduct electricity. Here's what a conductive pen can do: Circuit Prototyping: Conductive pens are often used for rapid prototyping of electronic circuits. Instead of traditional methods like soldering, engineers can draw circuit traces directly onto a PCB using the conductive pen. Repairs: These pens are useful for repairing damaged or broken circuit traces on electronic devices or printed circuit boards (PCBs). By drawing a new conductive trace with the pen, one can restore the electrical connection without requiring complex rework. Low-voltage Electronics: Conductive pens are suitable for low-voltage applications, such as wearable electronics, simple sensors, touch-sensitive interfaces, and other electronic projects that don't involve high power or high-frequency signals. CircuitWorks Repair/ Cleaning Products Learn more in our Blog Follow our Linkedin

What can be used as electrical contact cleaner?

We recommend choosing a solvent engineered specifically for contact cleaning. Other solvent cleaners an be used, but be aware or the following factors: Spray force - Aerosol cleaners are generally used to penetrate into the tight areas around the contact and provide agitation. Dielectric strength - If you are cleaning energized (powered) equipment, use a cleaning solvent with a dielectric strength of 30 kV (30,000V) or higher. This prevents shorting the equipment. Dielectric strength is defined as the maximum electric field that the material can withstand under ideal conditions without breaking down. Breaking down in this sense is described as a failure of insulating properties, where the electricity breaks free of the conductors and burns a path through the weakest area of the insulating materials. Solvency / cleaning strength - The solvent cleaner needs to be strong enough to dissolve oil and other contamination. Flammability - If there is risk of flames or sparks, a nonflammable solvent is recommended. Evaporation rate - Since there isn't opportunity to wipe the solvent off the inner parts of the electrical device, fast evaporation is very helpful. Plastic compatibility - Electrical devices often contain plastics and gasketing material that can be damaged by harsh solvents. Additives - Some cleaners, like WD40, contain oils that are left behind. That can be a good way to prevent oxidation, but it depends on your application and equipment. In some cases, it could be considered a contamination -- especially silicone oil, which tends to migrate. Electrical Contact Cleaner Spray & Lubricants | High Purity Learn more in our Blog Follow our Linkedin

How do I figure out the shelf life of a product?

The shelf life of a product can be found on either the technical data sheet (TDS), available on the product page, or by looking on the certificate on conformance (COC). The COC can be downloaded by going to https://www.chemtronics.com/coc. Once you have the shelf life, you will need to add it to the manufacture date for a use-by date. The manufacture date can be identified by the batch number. The batch code used on most of our products are manufacture dates in the Julian Date format. The format is YYDDD, where YY = year, DDD = day. For example, 19200 translates to the 200th day of 2019, or July 19, 2019. This webpage explains and provides charts to help interpret our batch numbers: https://www.chemtronics.com/batch-codes.

Articles

Choosing The Best Flux for High Quality Electronic Soldering

When joining two metals in a soldering process, like used in PCB assembly, flux is required to achieve a true metallurgic bond. That ensures the solder joint doesn’t crack or come loose even with the day-to-day wear-and-tear. This article covers the types of fluxes available, the advantage...
Read This Post

Top 12 Mistakes Made When Repairing Electronic Circuit Boards

When it comes to repairing electronic circuit boards, it's important to have the right skills, tools, and techniques to avoid making costly mistakes. Despite the best intentions, even experienced technicians can make errors that can lead to further damage to the circuit board or even render it i...
Read This Post

Flexible Electronics Soldering Challenges: CircuitWorks Conductive Epoxy to The Rescue

The recent years have witnessed a tremendous transformation in electronics, from rigid forms to flexible, soft, and stretchable forms. These technological advancements will allow future electronics to be light and adaptive to the human body. In the quest for fully flexible commercial electronics (...
Read This Post

Guide to Selecting the Best Degreaser, Contact Cleaner or Flux Remover for Your Application

 Click step below for more information... Are you in search of the perfect degreaser, contact cleaner, or flux remover for your specific application? Look no further! This comprehensive guide aims to assist you in selecting the best cleaning solution to meet your needs. Whether you are dea...
Read This Post

Drawing Conductive Traces: Fast & Effective Method of Repairing PCB Trace Defects

Drawing Conductive Traces: Fast & Effective Method of Repairing PCB Trace Defects Continuity of copper traces is one of the primary tests conducted in a Printed Circuit Board (PCB) before qualifying. Any broken or damaged trace, sooner or later, may pose a risk to normal circuit operation. ...
Read This Post

Essential Guide to Flux for Soldering Electronics

When joining two metals in a soldering process, like used in PCB assembly, flux is required to achieve a true metallurgic bond. That ensures the solder joint doesn’t crack or come loose even with the day-to-day wear-and-tear. This article covers the types of fluxes available, the advantages an...
Read This Post

Ultimate Guide to Benchtop PCB Rework & Repair

The reality is that no soldering operation produces perfect assemblies every time. Even the highest quality components fail from time-to-time. That’s why understanding the best rework and repair methods and materials is so important for those who manufacture, maintain, or repair printed circ...
Read This Post
You did not finish submitting your information to request a sample